Getting Started
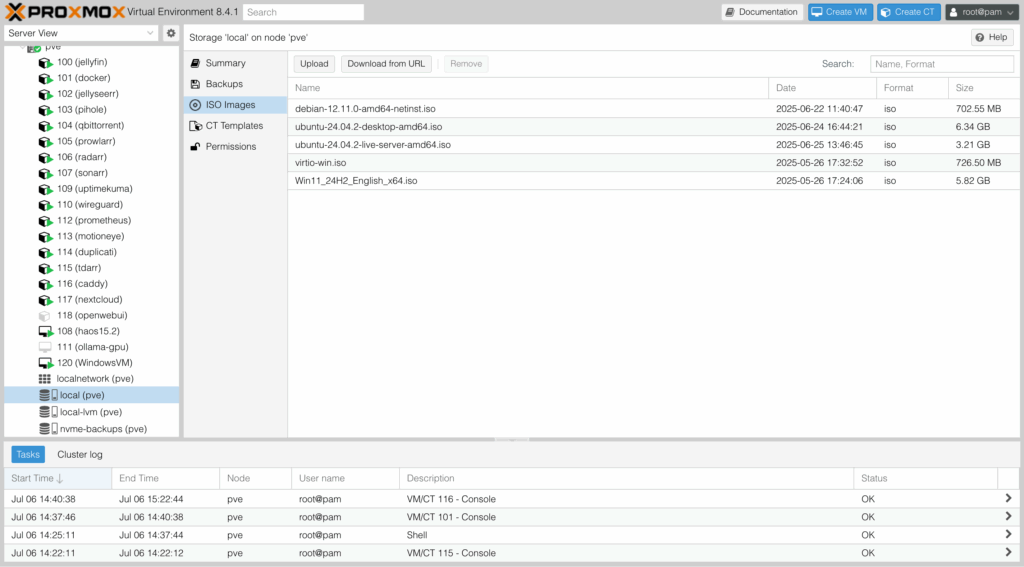
Ensure you have the Windows 11 ISO and the latest VirtIO Drivers ISO added to Proxmox. The easiest way is to visit your node’s storage pool and select the Download from URL option. You’ll be able to paste the file URL and upload the file to Proxmox for later use.
Create the VM
Select “Create VM” in the Proxmox GUI.
On the “General” tab, give the VM a memorable name.
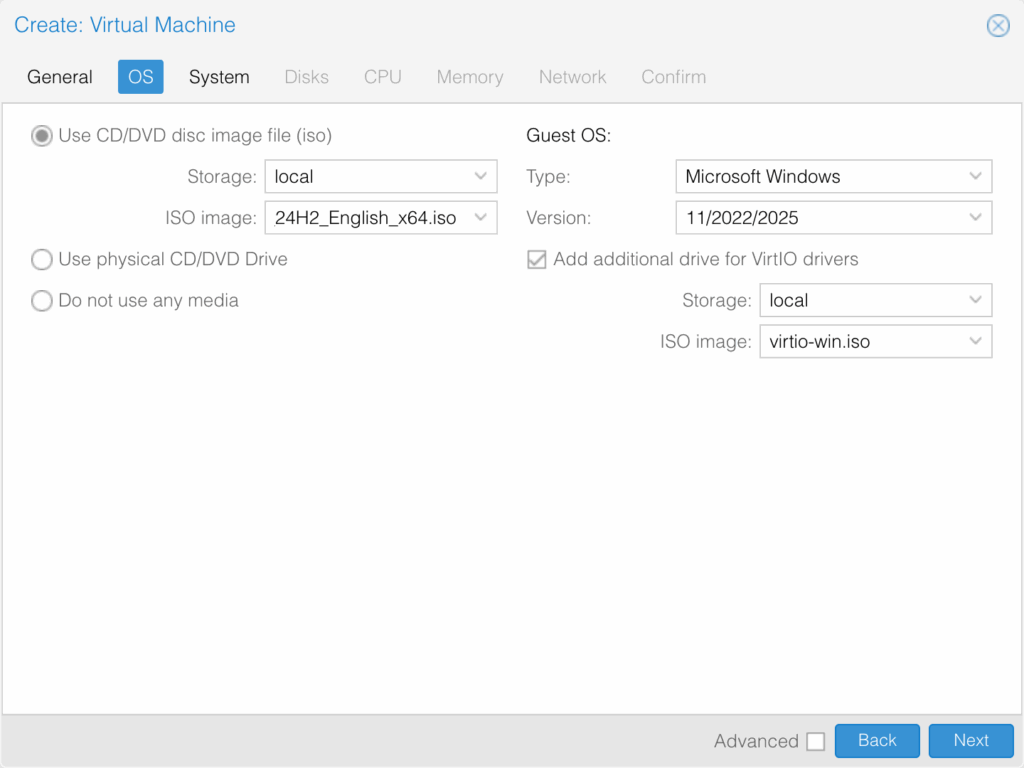
On the “OS” tab, locate and select the Windows 11 ISO downloaded previously. Under “Guest OS,” change “Type” to “Microsoft Windows” and “Version” to “11/2022/2025.” You’ll need to select “Add additional drive for VirtIO drivers,” then locate and select the VirtIO drivers ISO downloaded previously.
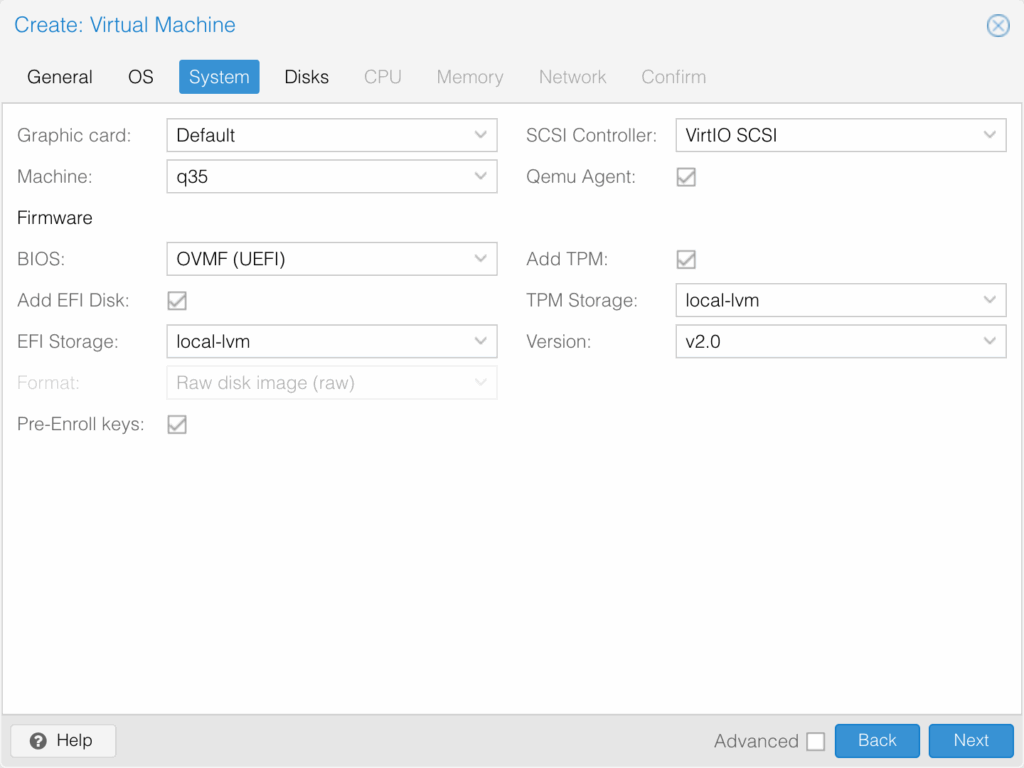
On the “System” tab, ensure “Machine” type “q35” is selected. I recommend changing the “SCSI Controller” option to “VirtIO SCSI.” Check the box for “Qemu Agent” if you want the ability to monitor the VM from within the Proxmox GUI. Ensure both “Add TPM” and “Add EFI Disk” are selected, and choose a location for the storage of those disks. These are used to store BIOS and boot information for the VM.
On the “Disks” tab, choose an appropriate amount of disk space for your use case. Note, that Windows requires at least 52GB for the boot drive. While you can increase this later, it is easier to start with a larger drive as increasing storage on an existing Windows VM requires additional steps within Windows itself.
For cache, I generally choose “Default (no cache),” based on guidance from Proxmox: https://pve.proxmox.com/wiki/Performance_Tweaks
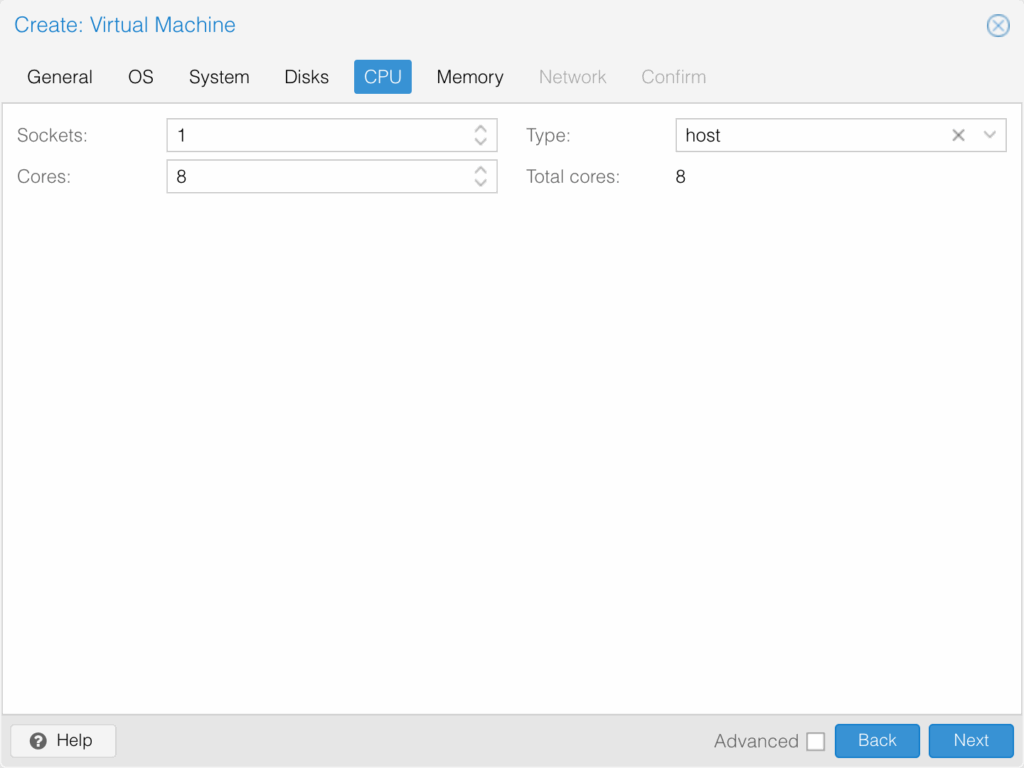
On the “CPU” tab, select an appropriate socket and core count for your use case. Generally, selecting 1 socket and 8-10 cores is sufficient for most purposes. I generally select “host” as the “Type” as Windows will see the true processor brand and model type, instead of a generic virtual processor.
On the “Memory” tab, choose an appropriate amount of RAM for your use case. Enter the amount in binary, i.e. 1GB = 1024MB; 8GB = 8192MB.
On the “Network” tab, the default settings should be sufficient for most use cases. Add a VLAN tag if needed for your use case.
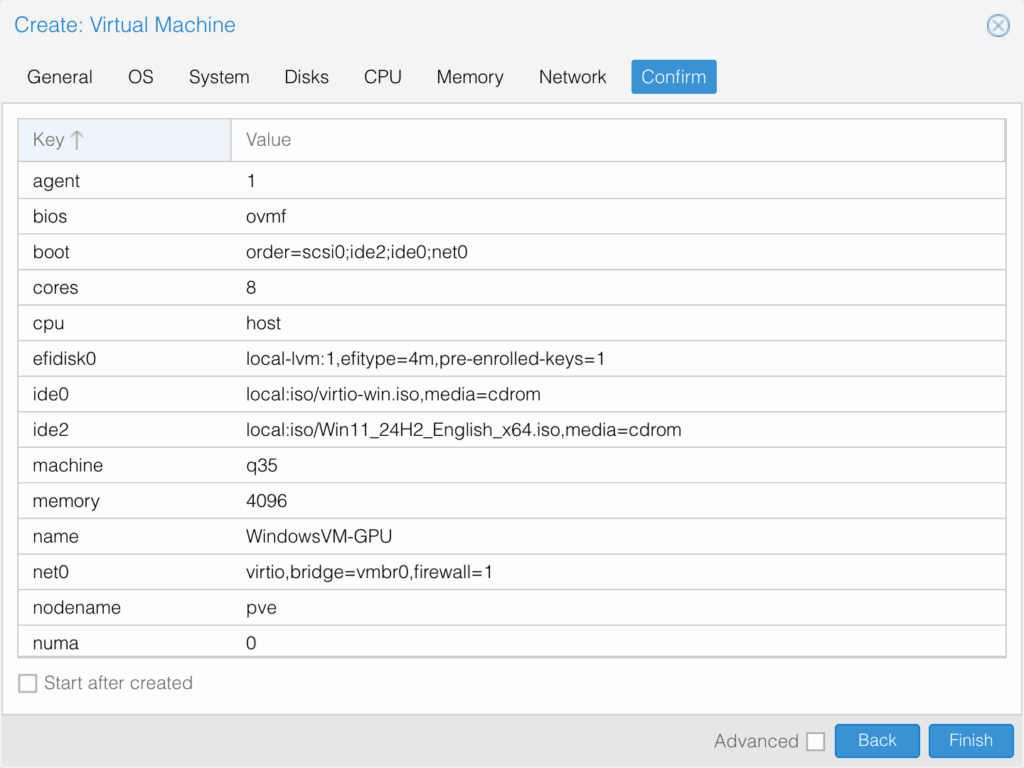
On the “Confirm” tab, double check your machine’s details and click “Finish.” I usually leave “Start after created” unchecked as we’ll need to initialize Windows setup within the VM with the press of a key on our keyboard.
Install Windows
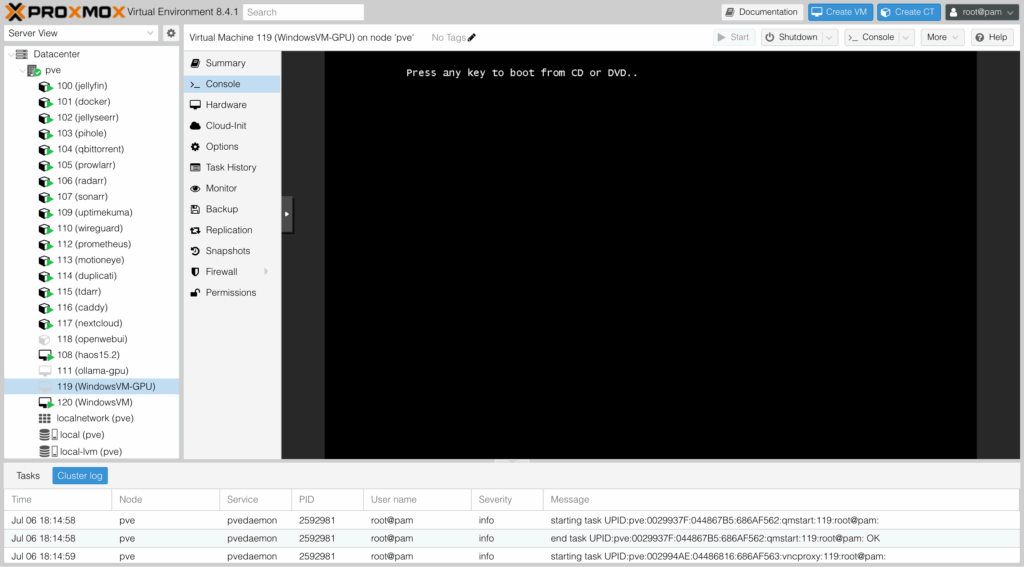
From the Proxmox GUI, select the VM and navigate to the “Console” tab. Here you’ll see the output of the VM. Click the “Start Now” button and press any key on your keyboard when prompted after the Proxmox boot screen.
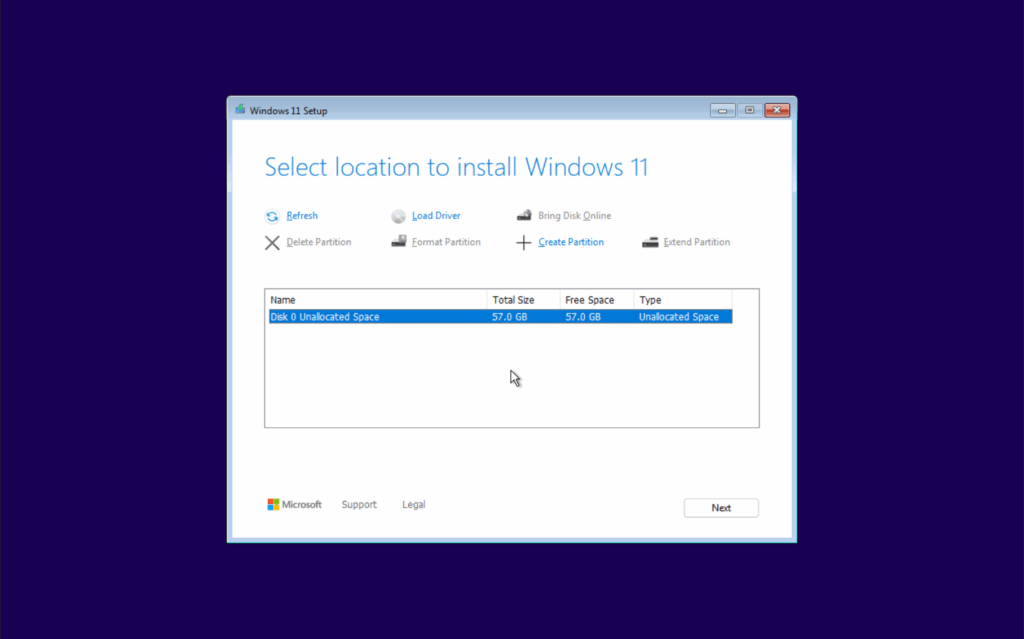
At this point, the VM will enter the Windows 11 installation and setup process. The first few screens are pretty straightforward. Once you’ve selected the version of Windows 11 you wish to install (Home, Pro, etc.) and accept the terms and conditions, you’ll be asked to select the drive where you want to install Windows 11. You’ll likely see no options:
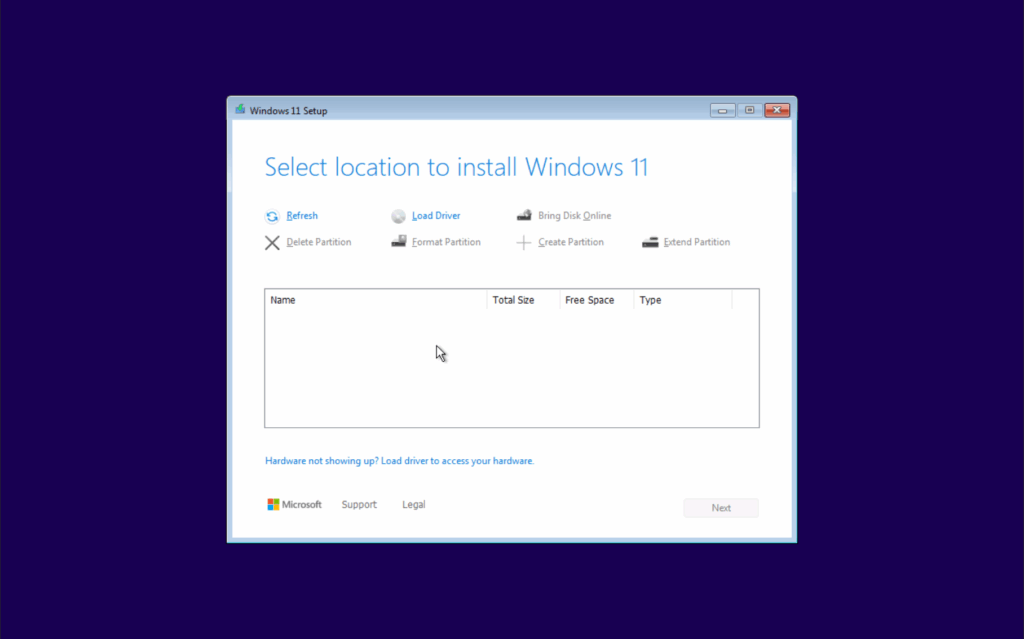
At this screen, click “Load Driver,” then navigate to the drive that contains the VirtIO ISO selected earlier. Select the “vioscsi” folder, then “w11,” then “amd64.” Once loaded, select the “Red Hat VirtIO SCSI” driver, then “Install.”
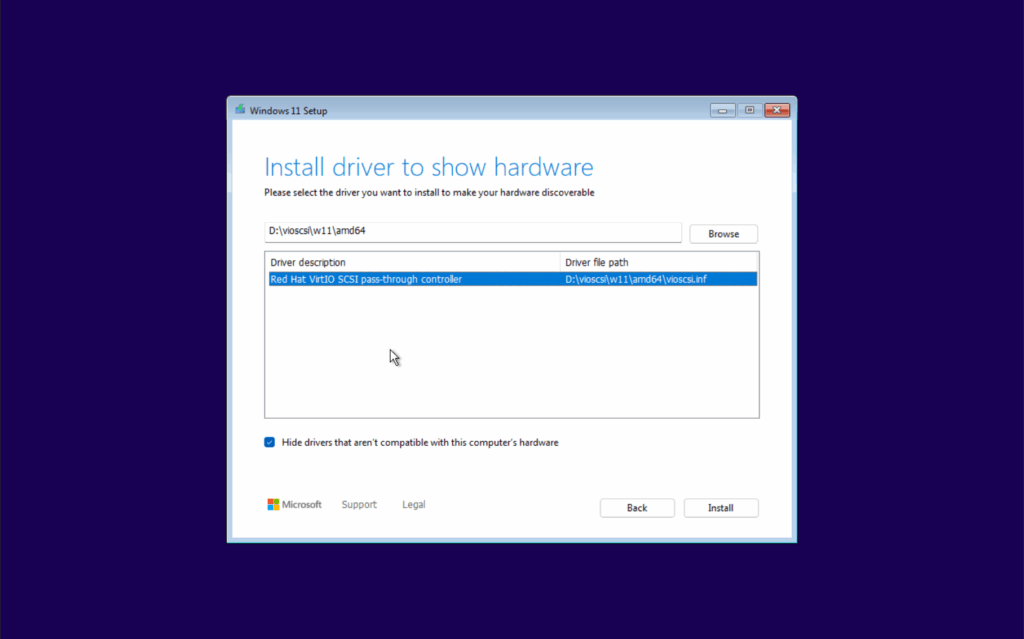
Once the driver is installed, you’ll see your drive:
Continue to install. The VM will restart a few times. Once installed, you’ll begin the Windows 11 setup process to configure some settings. These screens are straightforward, select the options that apply to your setup.

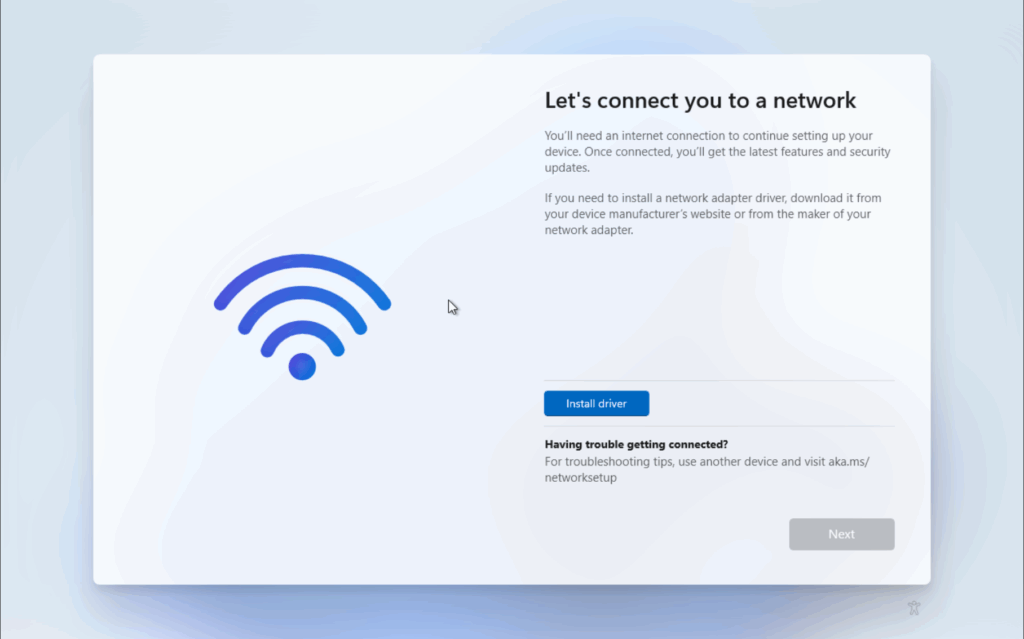
Once you’ve landed on the “Let’s connect you to a network page,” we’ll once again need our VirtIO drivers. Select “Install,” then navigate to the drive that contains the VirtIO drivers ISO. This time, we’ll navigate to “NetKVM,” “w11,” then “amd64.” After clicking “Select Folder,” the driver will install and you should see the virtual network adapter installed, and the virtual network connected! Select “Next” to continue.
Next, you’ll name your device and Windows will check for the latest updates. This may take some time, so take a break – you earned it!